Enable Virtualization on HP PCs
Many commercially available PCs allow users to manage their BIOS configuration directly from the startup screen. These step-by-step guides will help you access and adjust the BIOS settings on prebuilt PCs manufactured by Hewlett-Packard (HP).
If you don't know what kind of CPU you have, please see Identifying Your CPU.
OMEN, Victus, Spectre, ENVY, and HP Pavilion Series PCs
-
Restart or boot your computer.
-
Immediately press the F10 key to enter the BIOS Setup Utility.

-
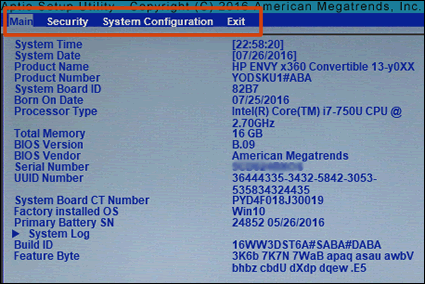
Using the arrow keys, navigate to the Configuration tab.
-
Select Virtualization Technology from the menu.
-
Enable this setting with the left or right arrow key.
-
Press F10 once more to save your configuration and exit.
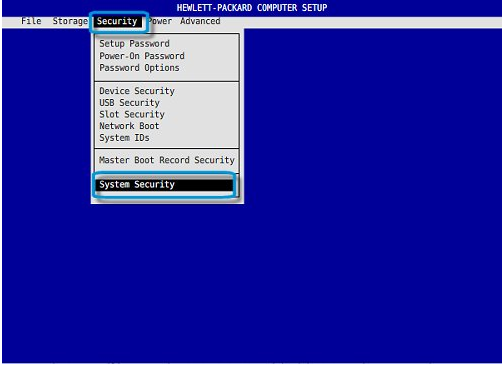
HP Workstations & Business Series PCs
-
Restart or boot your computer.
-
Immediately press the F10 key to enter BIOS setup.
-
Using the arrow keys, navigate to the Security tab.
-
Select System Security from the menu.
-
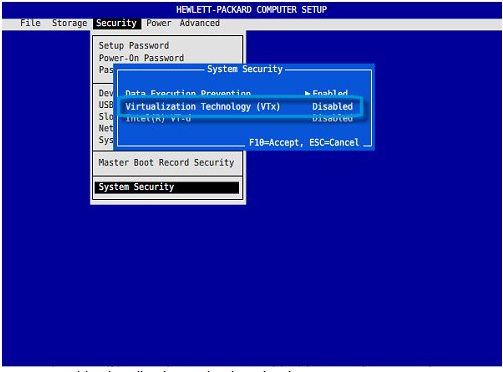
Using the arrow keys, select Virtualization Technology (VTx).
-
Enable this setting with the left or right arrow key.
-
Press F10 once more to save your configuration and exit.
HP and Compaq Notebook PCs
This guide is for HP PCs manufactured during or after mid-2011. Earlier models are ineligible.
-
Restart or boot your computer.
-
Immediately and repeatedly press the Esc key to open the Startup Menu.
-
Press the F10 key to enter the BIOS Setup Utility.
(Source)
-
Using the arrow keys, navigate to the System Configuration tab.
-
Select Virtualization Technology from the menu.
-
Enable this setting with the left or right arrow key.
-
Press F10 once more to save your configuration and exit.
Last updated on