Enable Virtualization by Motherboard: Gigabyte
Depending on your hardware configuration, your motherboard manufacturer's software may dictate how and where BIOS settings can be accessed and modified. This guide details common BIOS setup patterns on machines equipped with a motherboard manufactured by Gigabyte.
If you don't know what kind of motherboard you are using, please see Identifying Your Motherboard.
With Intel Processors
-
Restart or boot your computer.
-
Immediately press the BIOS setup key listed on the Gigabyte loading screen. (If no key is listed, try pressing the Del key to enter the BIOS Setup Utility.)
-
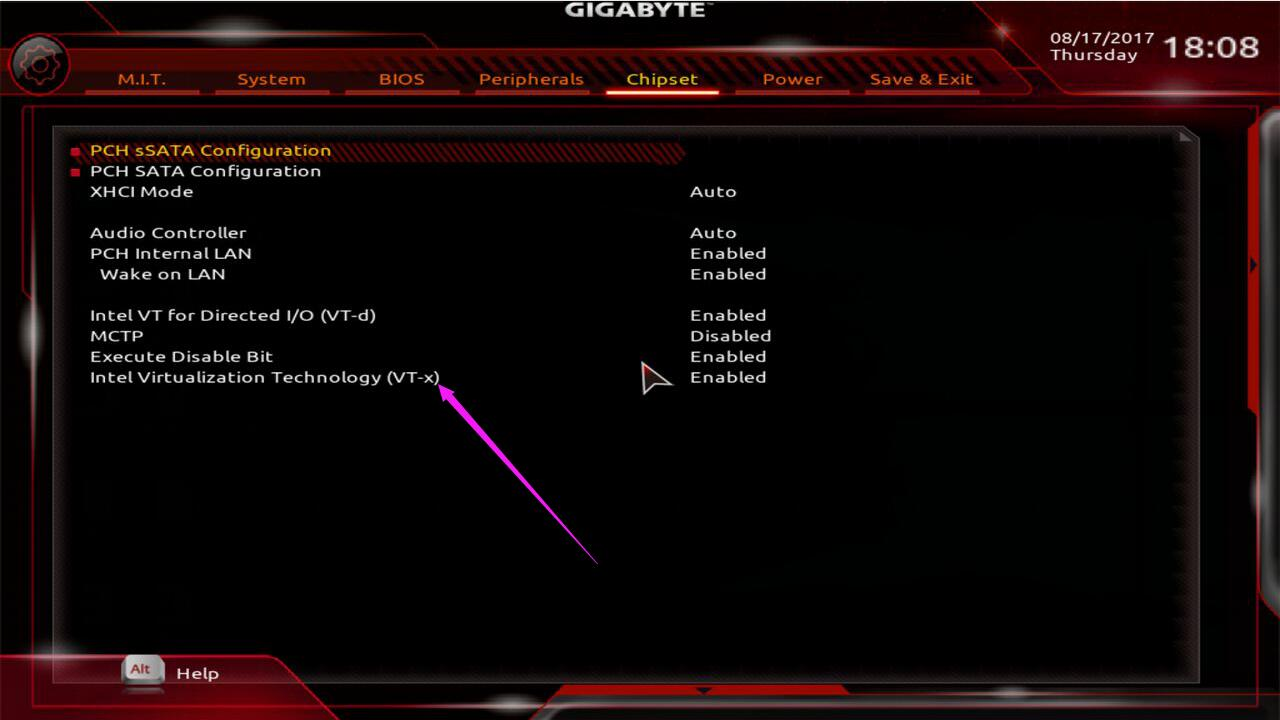
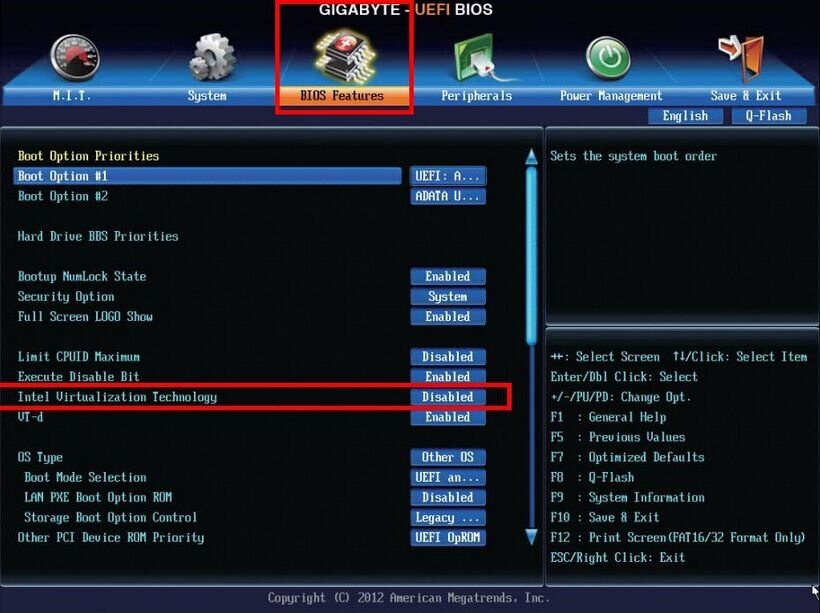
Navigate to the BIOS Features tab using the arrow keys or mouse.*
*In the utility software of certain Gigabyte motherboards, required virtualization support features may be listed under the Chipset tab.
-
Scroll through the menu to find Intel Virtualization Technology, Intel Virtualization Technology (VT-x), Intel VT, VT-d, or generic terms such as "Virtualization**."**
-
Enable all relevant features with the left or right arrow key.
-
Press F10 to save your configuration changes and exit.
 (
( (
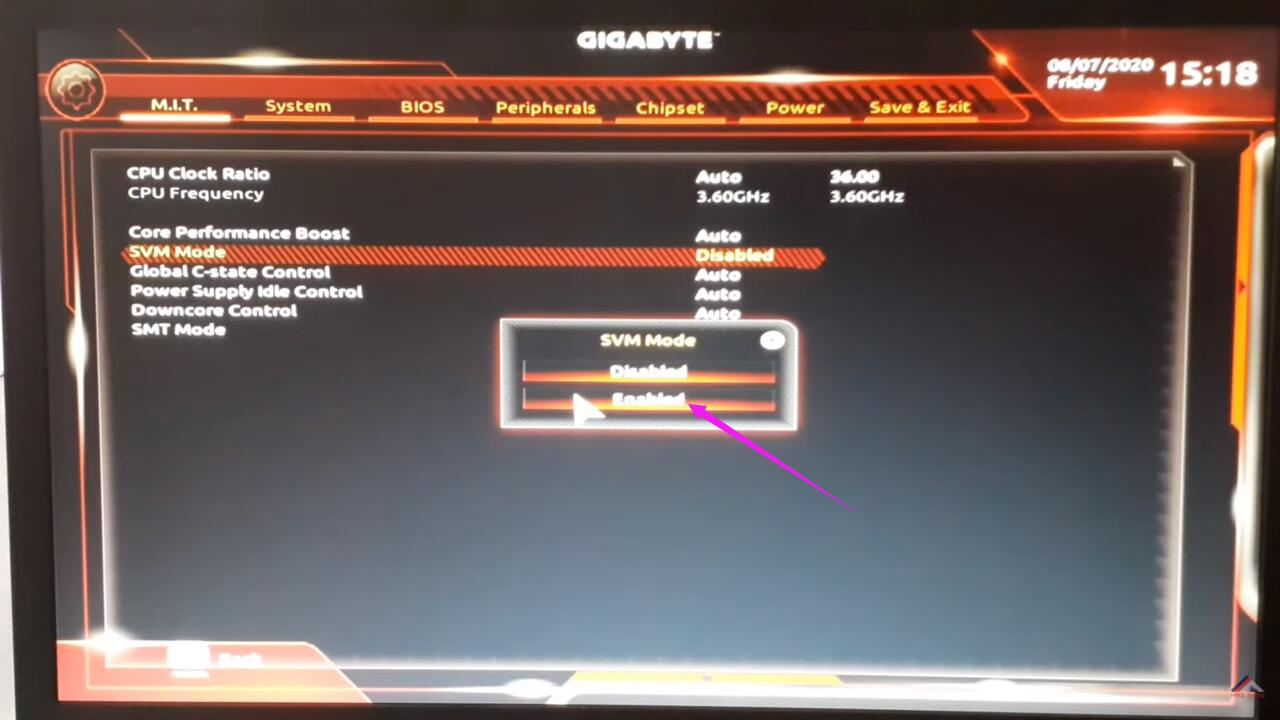
(With AMD Processors
-
Restart or boot your computer.
-
Immediately press the BIOS setup key listed on the Gigabyte loading screen. (If no key is listed, try pressing the Del key to enter the BIOS Setup Utility.)
-
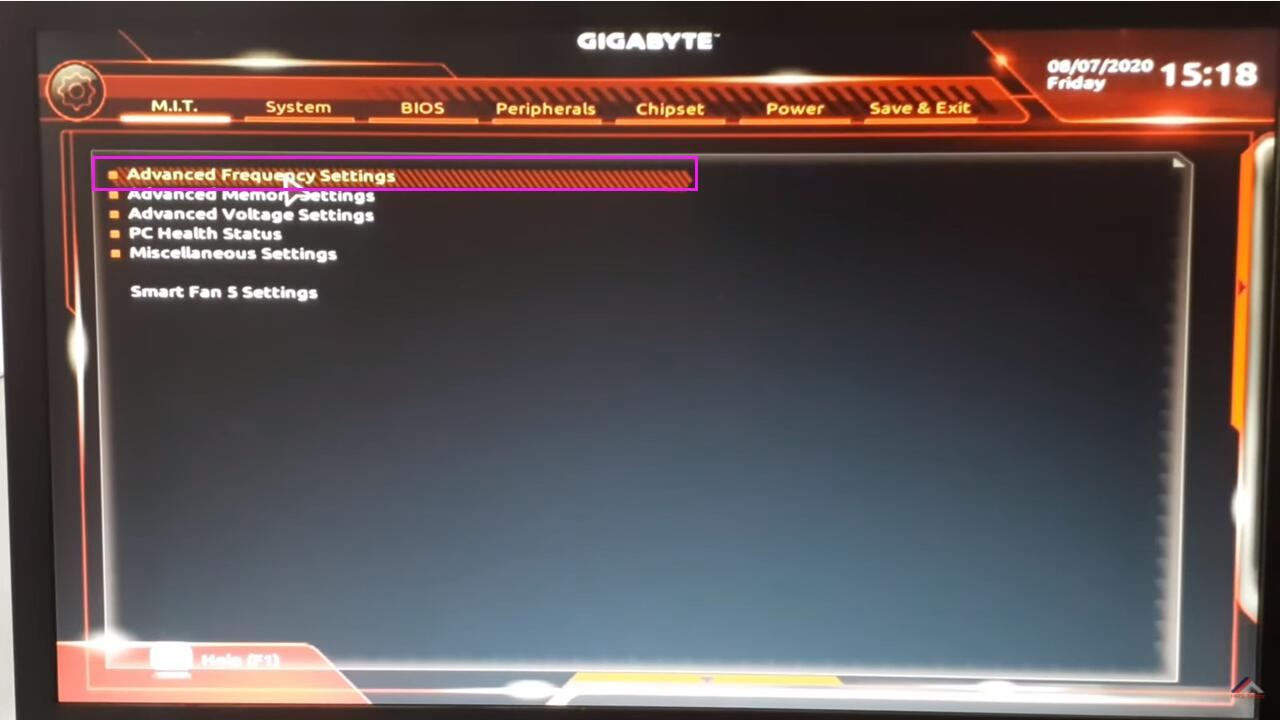
Navigate to the M.I.T. tab using the arrow keys or mouse.
-
Click Advanced Frequency Settings.
 (source)
 -
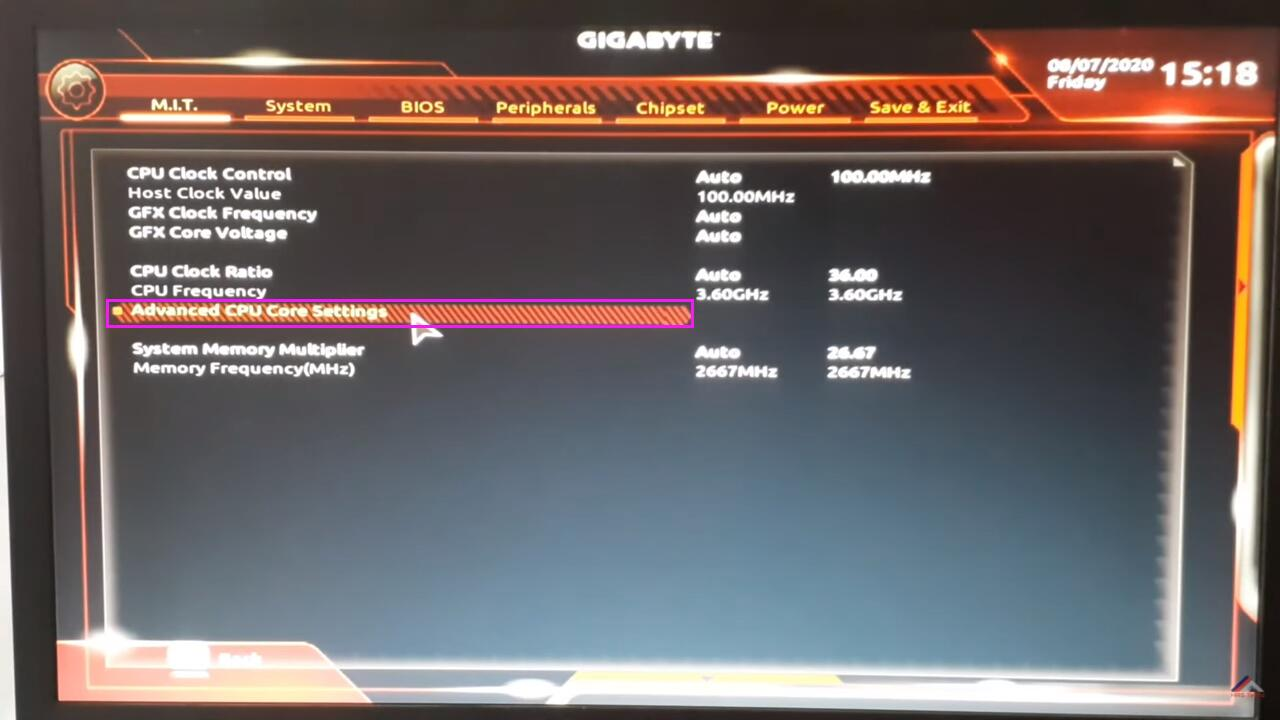
Click Advanced CPU Core Settings.
 (source)
 -
Enable SVM Mode using the arrow keys or mouse.
 (source)
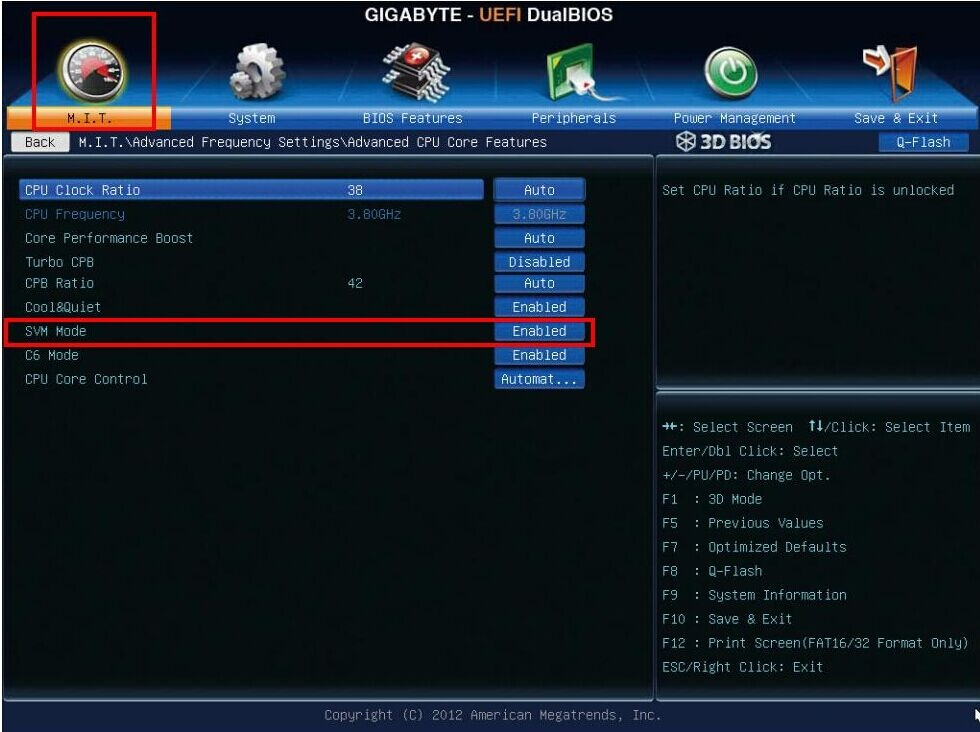 (source)
 -
Press F10 to save your configuration changes and exit.
Last updated on