Enable Virtualization on Asus PCs
Many commercially available PCs allow users to manage their BIOS configuration directly from the startup screen. These step-by-step guides will help you access and adjust the BIOS settings on prebuilt PCs manufactured by Asus.
If you don't know what kind of CPU you have, please see Identifying Your CPU.
With Intel Processors
-
Restart or boot your computer.
-
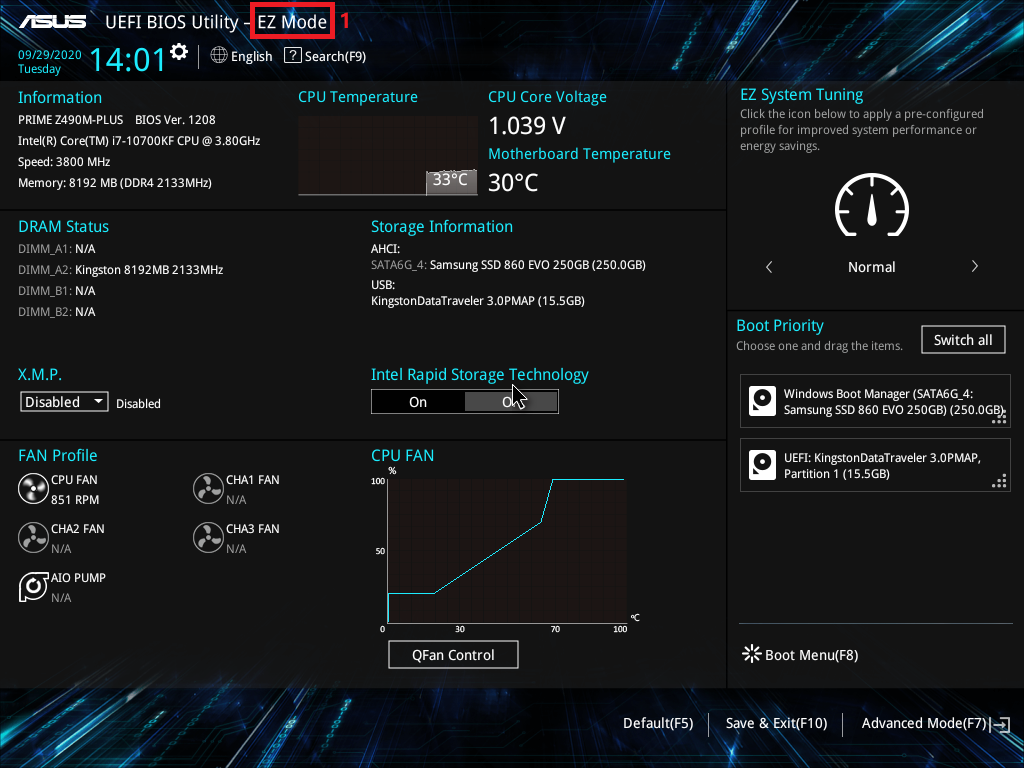
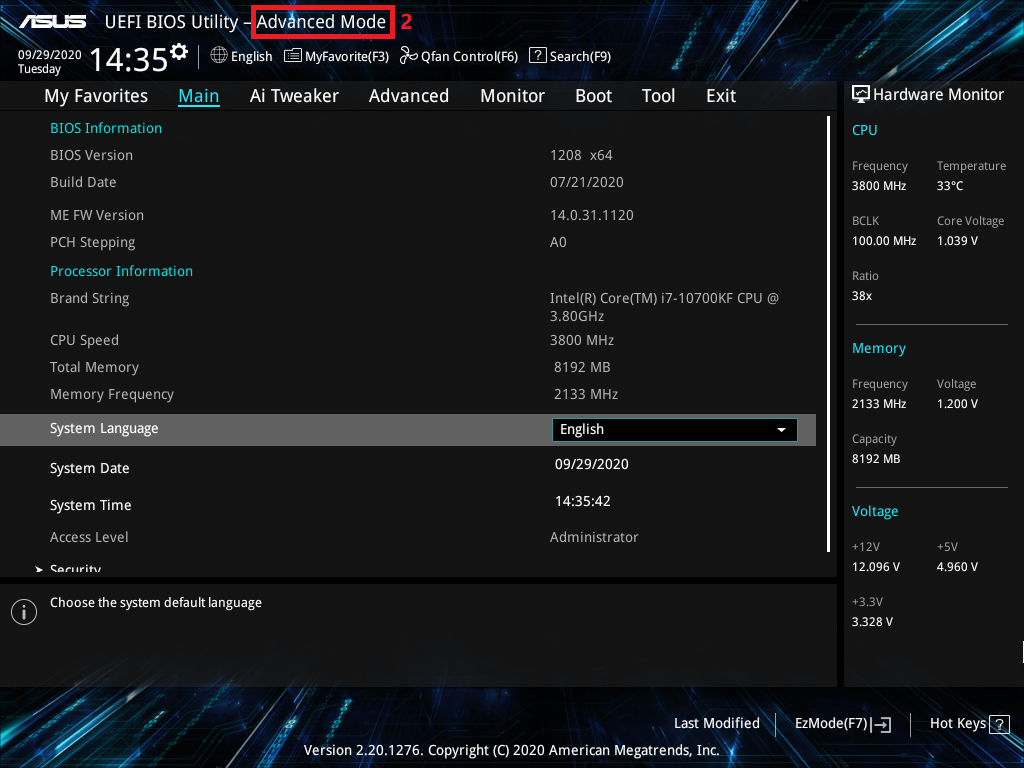
Immediately press Del to access BIOS setup. If your system launches in BIOS [EZ Mode] by default (#1), you may need to press F7 key to access [Advanced Mode] (#2)
 (source)
 (source)
 -
Navigate to the Advanced (#3) tab with the arrow keys or mouse.
-
Click or hit enter to expand the CPU Configuration (#4) settings.
-
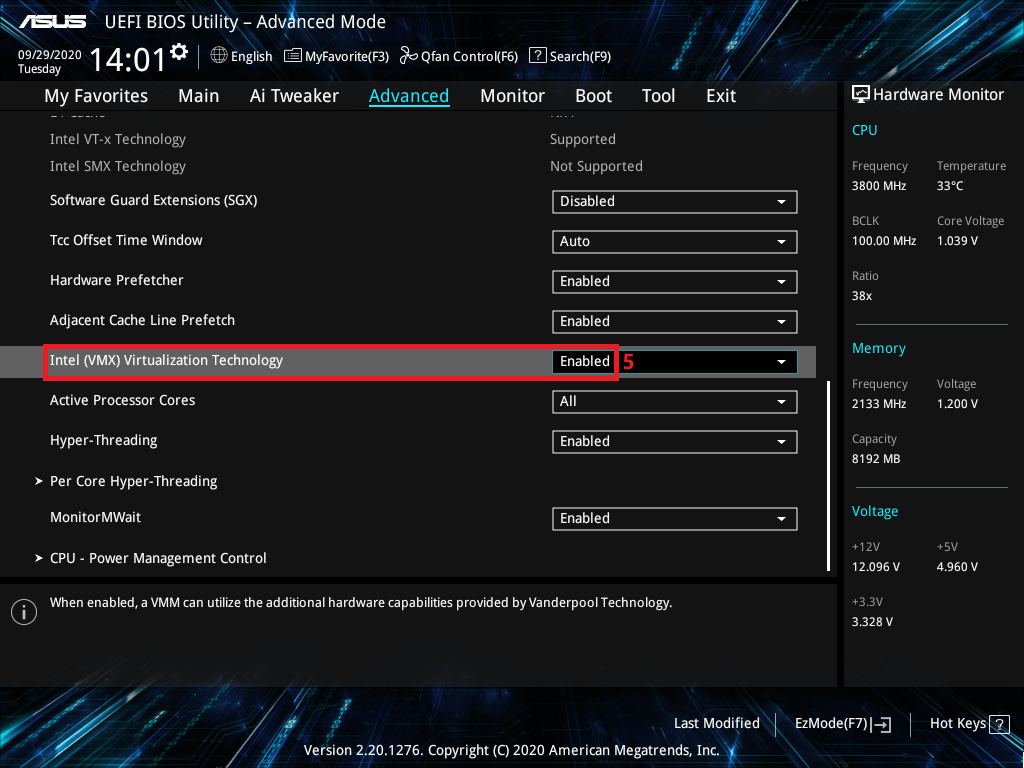
Scroll down and enable Intel (VMX) Virtualization Technology (#5).
-
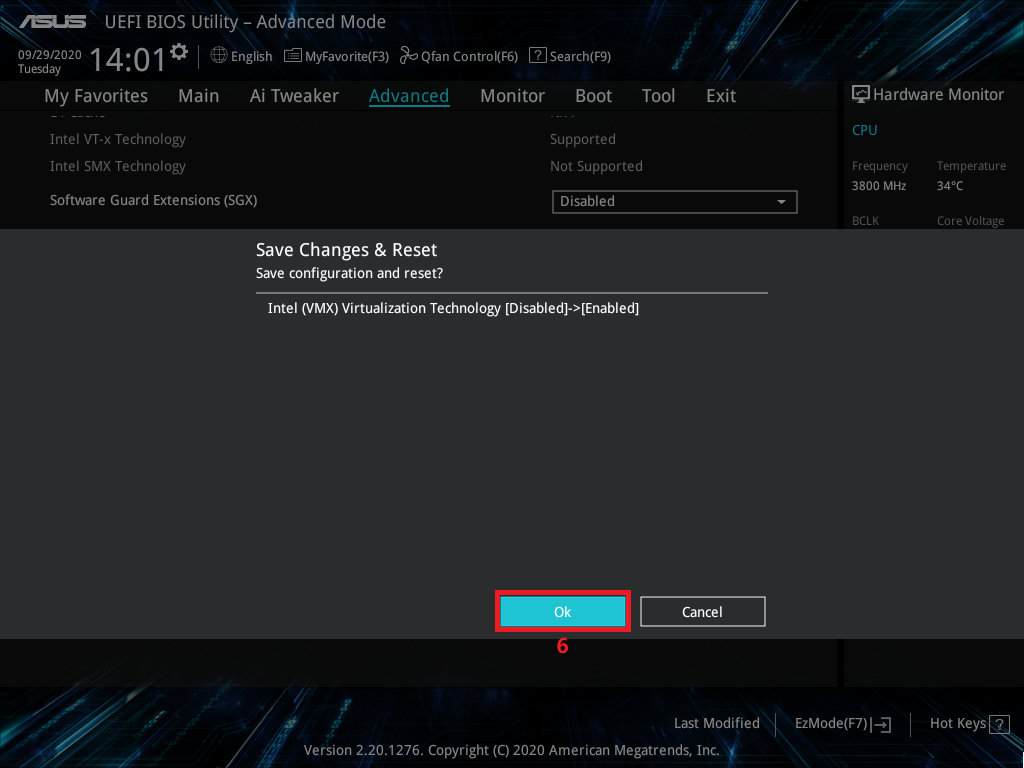
Press F10 and click "OK" (#6) to save your configuration and exit.
 (
( (
( (
(With AMD Processors
-
Restart or boot your computer.
-
Immediately press Del to access BIOS setup. If your system launches in BIOS [EZ Mode] by default, you may need to press F7 key to access [Advanced Mode] (Fig. 1)
 (source)
 -
Navigate to the Advanced tab with the arrow keys or mouse.
-
Click on the CPU Configuration settings from the menu.
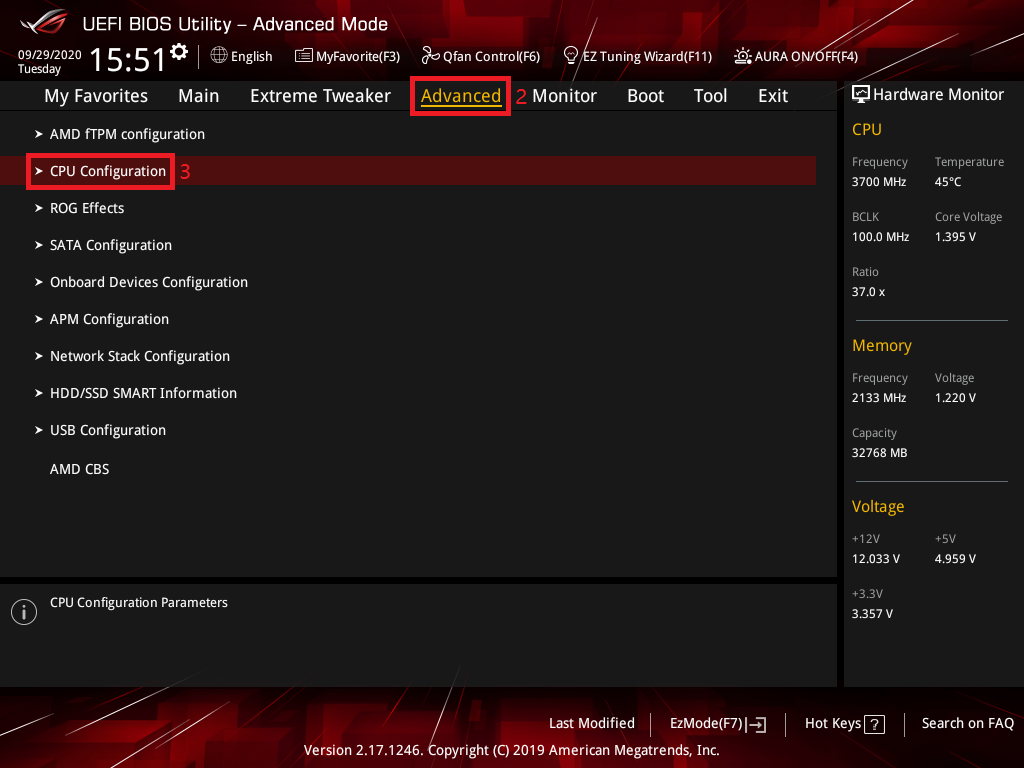 (source)
 -
Scroll down and enable SVM Mode.
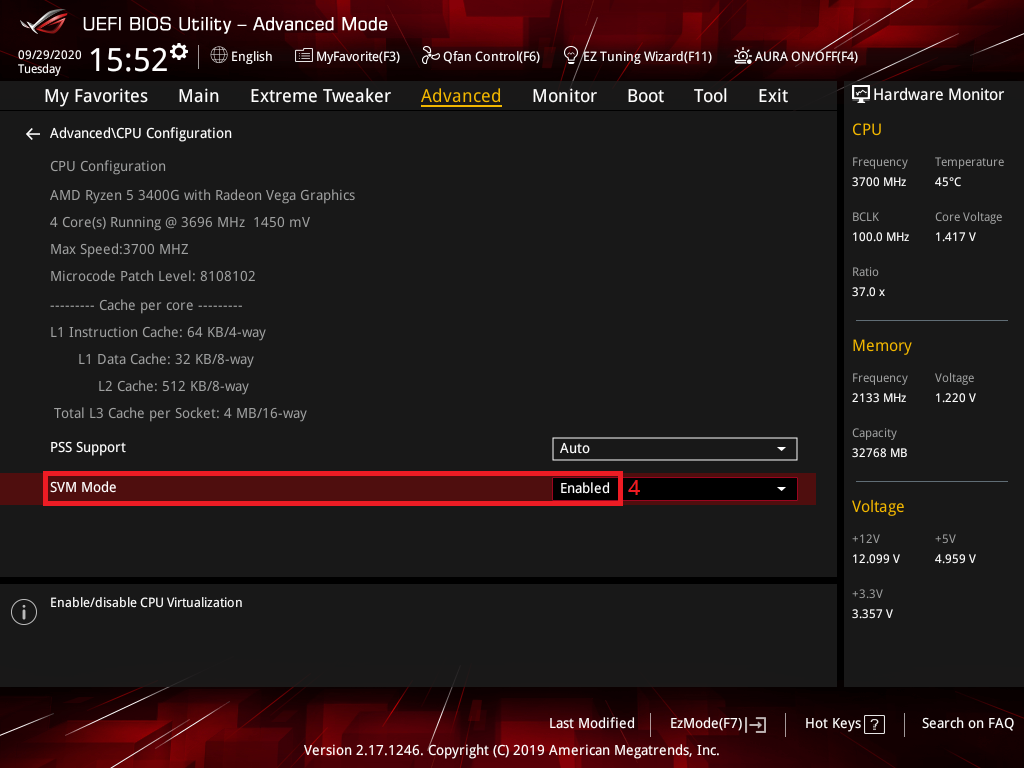 (source)
 -
Press F10 and click "OK" to save your configuration and exit.
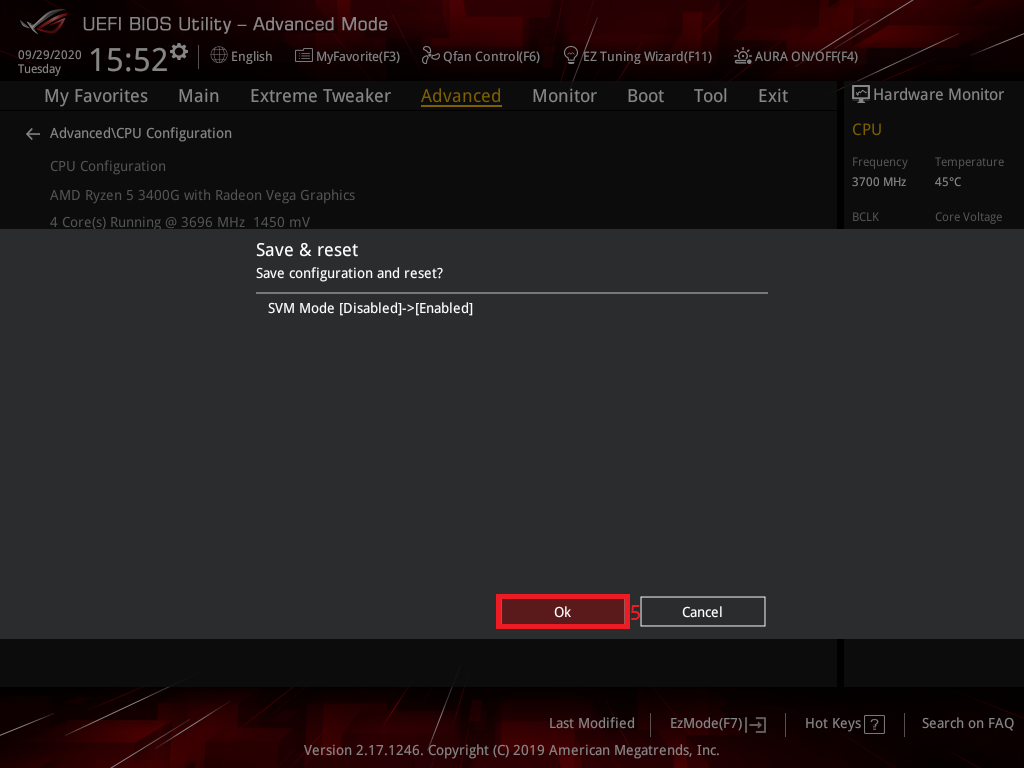 (
(Last updated on